There’s something magical about the nostalgia of old movie theaters—the paper tickets, glowing marquees, buttery popcorn, and the excitement of settling into your seat before the show begins. When I opened the Simon Says Stamp June 2026 Card Kit, Step Right Up, I immediately knew I wanted to lean into that vintage cinema aesthetic rather than the carnival theme showcased in many of the kit samples. The combination of Tim Holtz-inspired elements, vintage tickets, and dimensional popcorn made it the perfect foundation for a movie-themed collection of cards.
The Step Right Up kit is packed with exclusive goodies including the 3D Popcorn Box Die, White Heat & Fluff, ticket-themed dies, vintage-inspired card panels, and a Tim Holtz Idea-ology Ticket Book. For these projects, I also incorporated the Tim Holtz Cling Rubber Stamps – At The Movies stamp set to reinforce the classic theater theme and add additional vintage imagery and typography.
Creating Realistic Popcorn
The star of every card in this collection is undoubtedly the popcorn! I die cut multiple popcorn pieces using the kit’s exclusive 3D Popcorn Box die and then applied the included White Heat & Fluff to create wonderfully dimensional kernels. After heating, the texture transforms into realistic-looking popcorn that practically jumps off the card front. It’s one of those techniques that never gets old and adds incredible tactile interest.
To give the popcorn a buttery appearance, I lightly inked the pieces with warm yellow tones before assembling the overflowing popcorn boxes.
Card One: Making Memories at the Movies
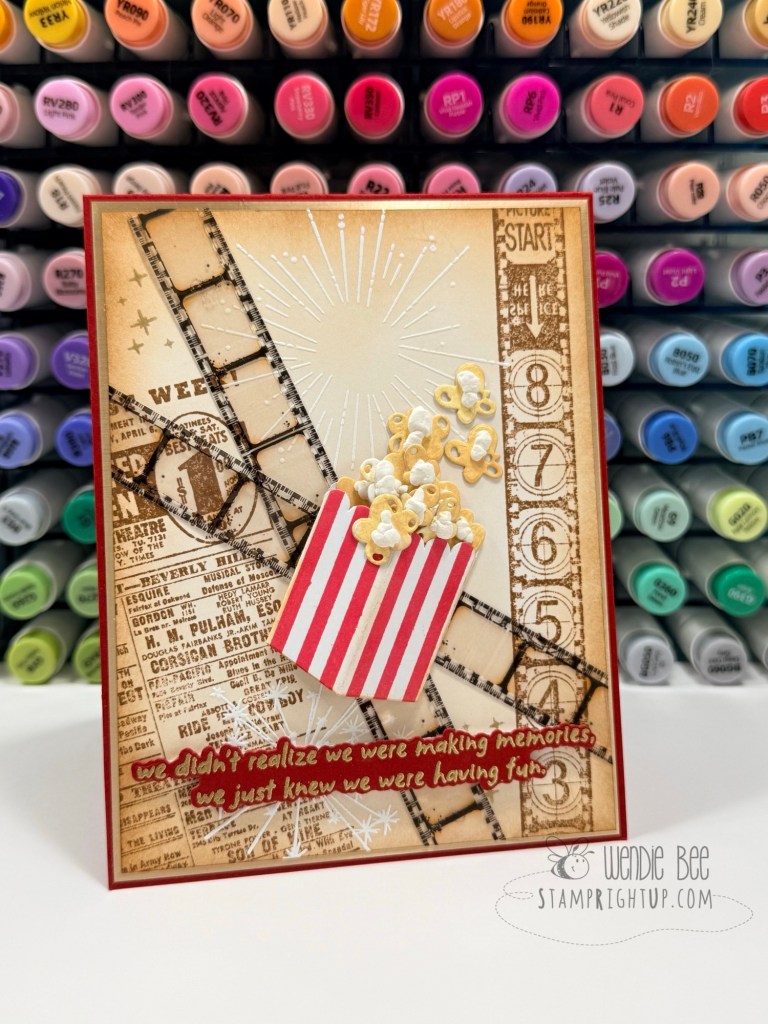
For the first card, I created a vintage movie collage featuring distressed film strips layered across a background stamped with imagery from the At The Movies set. A large spotlight burst draws the eye toward the center while the overflowing popcorn box anchors the design.
The sentiment, “We didn’t realize we were making memories, we just knew we were having fun,” perfectly captures the feeling of movie nights with family and friends. The combination of aged neutrals, rich red accents, and vintage ephemera creates a timeless look that feels both nostalgic and elegant.
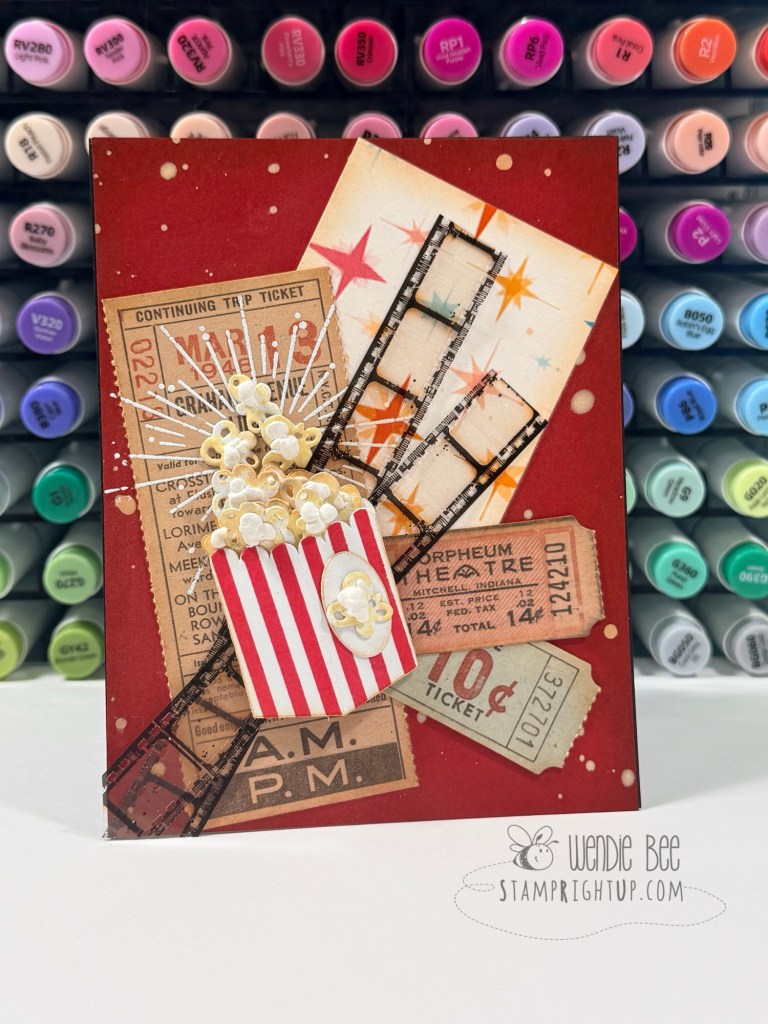
Card Two: Popcorn Explosion
For the second card, I embraced a more playful composition. Vintage ticket pieces from the Tim Holtz Idea-ology Ticket Book were layered behind a large popcorn box, creating the feeling of a movie night collage board.
I love how the black film strips weave through the design, connecting all of the elements while helping direct the eye around the card. The distressed ticket pieces add authenticity and reinforce the old-fashioned cinema vibe.
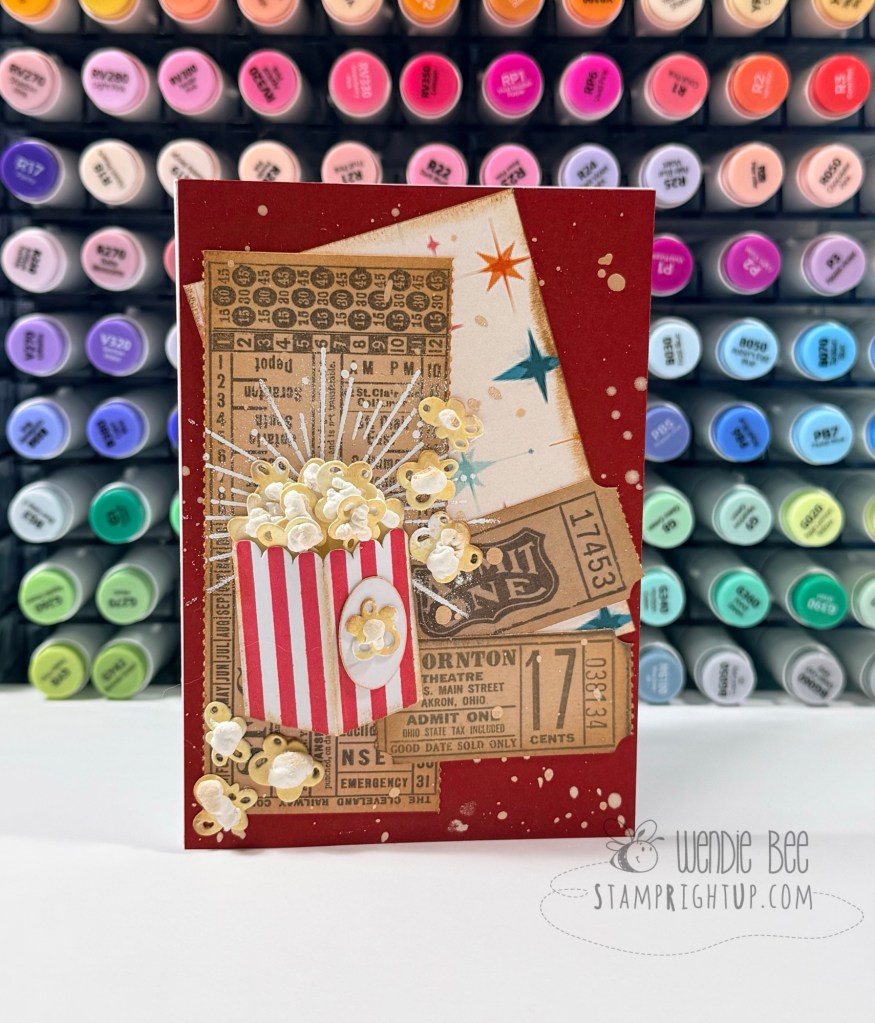
Card Three: Admit One
The final card continues the vintage theater theme with additional ticket book elements arranged into a layered background. The colorful starburst patterned paper from the kit peeks through the design, adding a fun retro feel without overwhelming the vintage aesthetic.
The popcorn box once again takes center stage, but this time the surrounding ticket elements become part of the storytelling—almost like a collection of keepsakes saved from favorite movie nights over the years.
Bringing the Theme Together
One of my favorite things about this kit is its versatility. While the Step Right Up theme naturally lends itself to carnivals and fairs, the inclusion of tickets, popcorn, and vintage-inspired elements made it easy to shift the focus toward classic movie theaters and cinema memories. The addition of the Tim Holtz At The Movies stamp set helped tie everything together beautifully and reinforced the nostalgic storytelling aspect of each card.
These projects are a reminder that card kits don’t have to be used exactly as intended. Sometimes the most creative designs come from looking at the components through a different lens and finding a theme that speaks to you.
Whether you’re creating cards for movie lovers, scrapbook layouts documenting family outings, or simply celebrating happy memories, this combination of vintage tickets, film strips, and fluffy popcorn is guaranteed to bring a smile.
Happy crafting! 🎬🍿