Graphic 45 Guilded Lily Easy Birthday Card

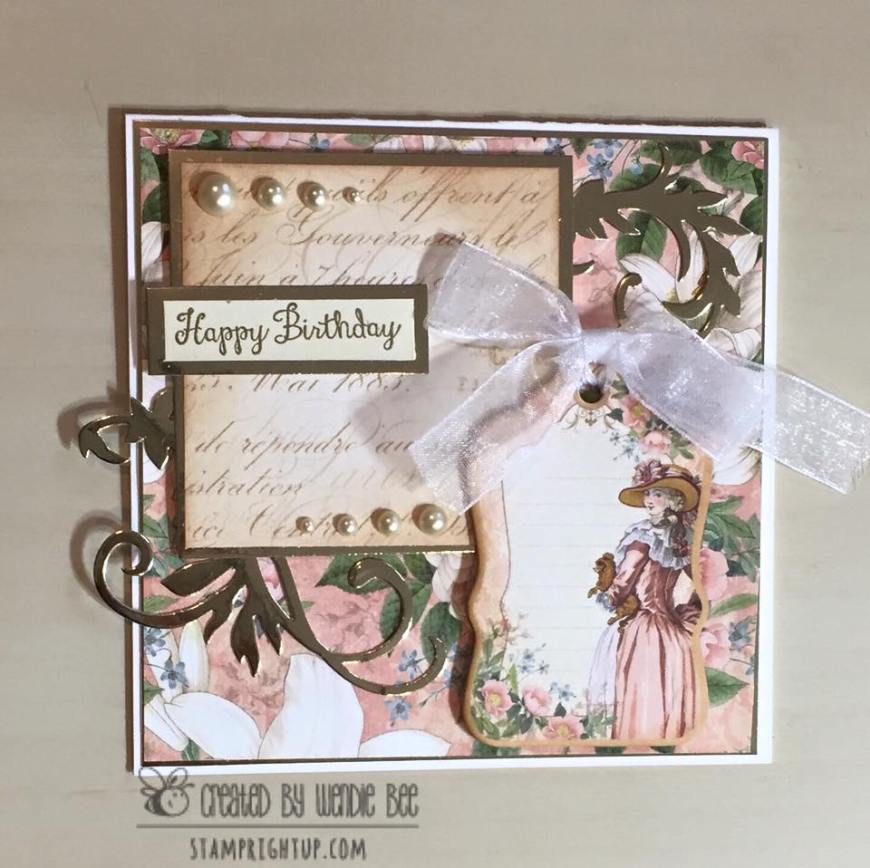
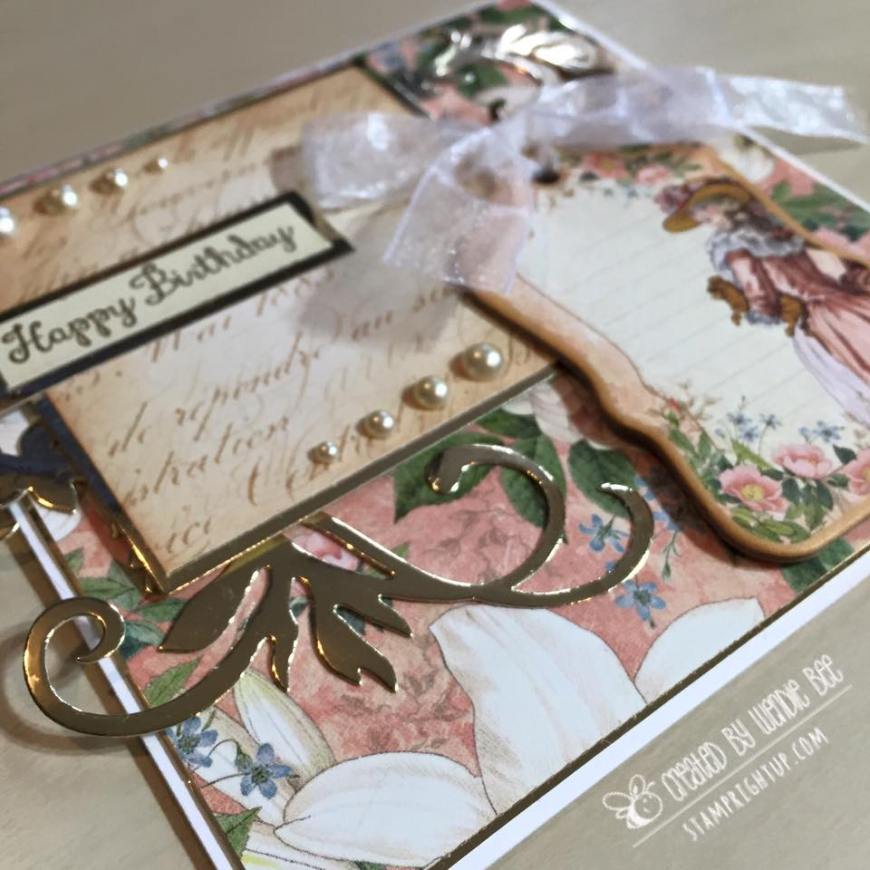
I have been really in to the shabby chic, ‘prettier’ cards lately. As you know, generally my style is more on the cutesy side, but I have been making an effort to diversify my skills and I have been trying out papers and collections that I have really loved.
This Gilded Lily collection from Graphic 45 was no exception. I had the opportunity to create a gorgeous album with this collection at the CHA summer show in Chicago this past summer and I really loved how versatile the paper and chipboards are!

I needed to make a birthday card for a co-worker and I knew she would appreciate something pretty – so I pulled out my Graphic 45 and leafed through the stack and decided on the two papers from the collection.

Graphic 45_Guilded Lily_Paper_Chipboard_Wendie Bee_Stamp Right Up_1

Graphic 45_Guilded Lily_Paper_Chipboard_Wendie Bee_Stamp Right Up_2

Here is a list of supplies if you would like to make this card at home!  Just comment below if you would like to have the measurements for this card & I will be happy to share that with you!

Thanks for stopping by & happy crafting!


Kaisercraft Fairy Dust Card Set Collection

I recently attended a class at my local craft store. I very rarely attend classes anymore, but I knew I just had to go when I saw that the new Kaisercraft Fairy dust collection was featured for this class. The talented Denise designed 4 gorgeous card for us, and when the class was over, we were left with scraps of paper to take home. I went home and immediately sat down and created 3 more 4bar notecards with the scraps! The paper in this Fairydust collection is just gorgeous, and is really, really easy to use. One of my challenges in crafting is using more patterned paper – and this collection has really gotten my creative juices flowing!

I ordered 2 more full pads of the paper and the coordinating Collectables ephemera and have been going to town creating!

The lavender and seafoam green colors are so versatile and brightens up the winter blahs! Here are the cards I created – I would be happy to share the measurements with you, just leave a comment for which card ❤

There is a list of the supplies I used listed below for you to check out to see if any of these would make a nice addition to your craft stash.  One thing that is great about this paper collection, is it’s 6.5″ square, a half inch bigger than a standard 6×6 stack! That means more paper to use & work with 😀 I can tell you I love this paper so much I bought two 6.5″ stacks!

Kaisercraft Fairydust_Card_Wendie Bee_Stamp Right Up

Kaisercraft Fairydust Card Set created by Wendie Bee of Stamp Right Up

Kaisercraft Fairydust_Card_Wendie Bee_Stamp Right Up

Kaisercraft Fairydust_Card_Wendie Bee_Stamp Right Up

Kaisercraft Fairydust_Card_Wendie Bee_Stamp Right Up

Kaisercraft Fairydust 4Bar Notecard Set created by Wendie Bee of Stamp Right Up

Kaisercraft Fairydust_Card_Wendie Bee_Stamp Right Up

Kaisercraft Fairydust_Card_Wendie Bee_Stamp Right Up


Karma Cards: Extended Hands Food Bank Valentine’s Edition

When I first started Karma Cards, I wanted to try and make every effort to try and do as much as I could.  The last year I wasn’t able to to as much charitable work as I hoped to, so this year I made it a resolution to schedule more charity card workshops.

I had done a Karma Cards class over the Christmas holidays, and it was a great success! My group donated almost 20 pounds of food for the Extended Hands food bank, and I wanted to make sure that I kept that initiative going after the holidays. I hosted another Karma Cards card making charity workshop this past weekend, and was able to collect both food and monetary donation for the Extended Hands Food Bank; a non-profit food bank in my area.  For my workshops, I donate all the materials and time to prepare, and I ask that attendee’s bring, in lieu of a class fee, either 6 non-perishable food items (like high protein items, baby formula or diapers) or a cash donation, 100% of which goes to the food bank, of $12 per person.  We all made 3 cards each, and I was able to collect a sizable box of food for donation to the food bank.

Karma Cards Charity Workshop hosted by Wendie Bee of Stamp Right Up for Extended Hands Food Bank

Karma Cards Charity Workshop hosted by Wendie Bee of Stamp Right Up for Extended Hands Food Bank


IF YOU WOULD LIKE TO HELP OUT TOO, BUT WERE UNABLE TO MAKE IT TO THE WORKSHOP, YOU CAN DONATE SAFELY & SECURELY THROUGH PAYPAL DIRECTLY TO THE FOOD BANK.  ALL OF YOUR DONATIONS MATTER, REGARDLESS OF THE SIZE, AND ARE VERY APPRECIATED! CLICK ON THE BUTTON TO DONATE NOW

Karma Cards PayPal Donation


Valentine’s Day Bee Mine Candy Tag Pouches with Paper Smooches & Lawn Fawn

Paper Smooches Lawn Fawn Bee Mine Valentine's Day Candy Tag Pouch by Wendie Bee of Stamp Right UpWhen I saw the project that Jennifer McGuire did using these Paper Smooches dies I knew I had to make them too! With Valentine’s Day coming up, I was inspired to take her project and run with it – and that’s when I came up with making the tag in to a pouch! While Jennifer’s project was super cute with the Burt’s Bees, I had just recently done a project with chapstick, so I decided to put lollipops in the pouch; but you could put anything you wanted in there :).  Die cutting fun foam was much easier than I thought, and I only needed to run the foam through my big shot once and it cut through perfectly.  I also decided to use the heart outlines that I got when I die cut the red foam to fill on some of the space on the front of the tag.  I just used my paper snips and trimmed off the top part of the heart & adhered them down with the matte  medium.  Having the precision tip applicator bottle made it much easier to apply the adhesive where I wanted it and not get my project all goopy.  When I went to choose a sentiment, I knew the Bee Mine stamp set from Lawn Fawn was a perfect addition for the pouches.

Once I had created the front of the tag, I die cut another tag and adhered it to the back with a strip of Scor-tape.  I decided that tape would be best rather than liquid glue as I needed something strong since there wasn’t a lot of room to put glue so as not to interfere with the size of the pocket too much.  If you don’t have scor-tape at home then you could use liquid glue, like TomBow – just make sure you give the project ample time to completely dry.


Here is a picture of how I applied the tape to allow for enough room inside the pouch.  You could stamp a To / From stamp on the backside of the pocket, write a personalized note or just leave it blank.

Paper Smooches_Lawn Fawn_Bee Mine_Valentines Day Candy Tag Pouch_Wendie Bee_Stamp Right Up

Once I had everything assembled, I decided to add some Wink Of Stella to the hearts, because you know – a little glitter is always better 😛

Here are the finished projects – to see a full tutorial on how to create the front portion of the tag, you can check out Jennifer’s video here.  There is also a full supply list below if you would like to make these yourself at home ❤


Paper Smooches Lawn Fawn Bee Mine Valentine's Day Candy Tag Pouch by Wendie Bee of Stamp Right Up

paper-smooches_lawn-fawn_bee-mine_valentines-day-candy-tag-pouch_61

Paper Smooches Lawn Fawn Bee Mine Valentine's Day Candy Tag Pouch by Wendie Bee of Stamp Right Up


http://static.inlinkz.com/ppr.js