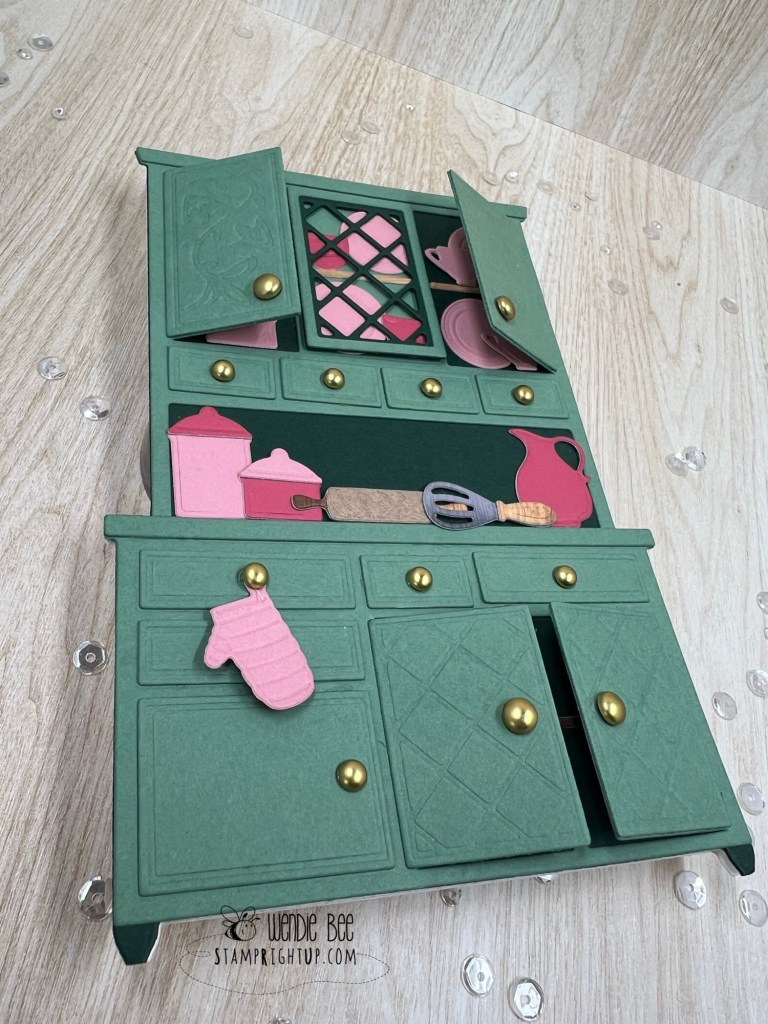
As part of our 2024 Fall Crop & Create Delivered workshops, Honeybee included this amazing Lovely Layers Hoosier Cabinet die set.
Yes, it has a lot of tiny pieces, but the it’s remarkably easy to work with!
Most of my pieces cut beautifully from coloured cardstock, or I used distress inks to color white 80lb cardstock to suit whatever color palette I wanted.
Using Honey Bee Metallic Mix pearls were perfect for the tiny drawer & door knobs. Enamel dots or Nuvo drops or anything you have in your stash could also work beautifully.
To add a festive twist, I pulled out my Lovely Layers Christmas Market Cart add on from Honey Bee and used the Bundt, pine boughs and stocking. Crimson cardstock from Spellbinders and white pieces inked with spun sugar oxide for the dishes and rustic wilderness for the boughs.
Honey Bee Lovely Layers Hoosier Cabinet with pieces from Christmas Market Cart Add OnHoney Bee Lovely Layers Hoosier Cabinet with pieces from Christmas Market Cart Add On
I recently had one of my lovely stampers request a wedding themed coffee & a card project, so I found this lovely card on Pinterest and knew I had to feature it for the workshop.
I loved that this card was easy to do using the masking technique, but still produced a beautiful card.
Now that the holidays are wrapping up there are some great new stamps that I can’t wait to show you all!
Bloom With Hope, Chalk Talk Black & White Classic Wedding Card by Wendie Bee of Stamp Right Up
A full list of supplies is below – click on thev image to shop online anytime. I can ship straight to your door for as low as $9.95 anywhere in Canada including Quebec. (Quebec residents please contact me to place your order)
WOOOO HOOOOO!! Party in the craft room today!! I *finally* found a method of coloring stamped images that did not require a thousand dollar investment!!
All you need: Standard pencil crayons, baby oil & blender tips (called pen or marker nibs)
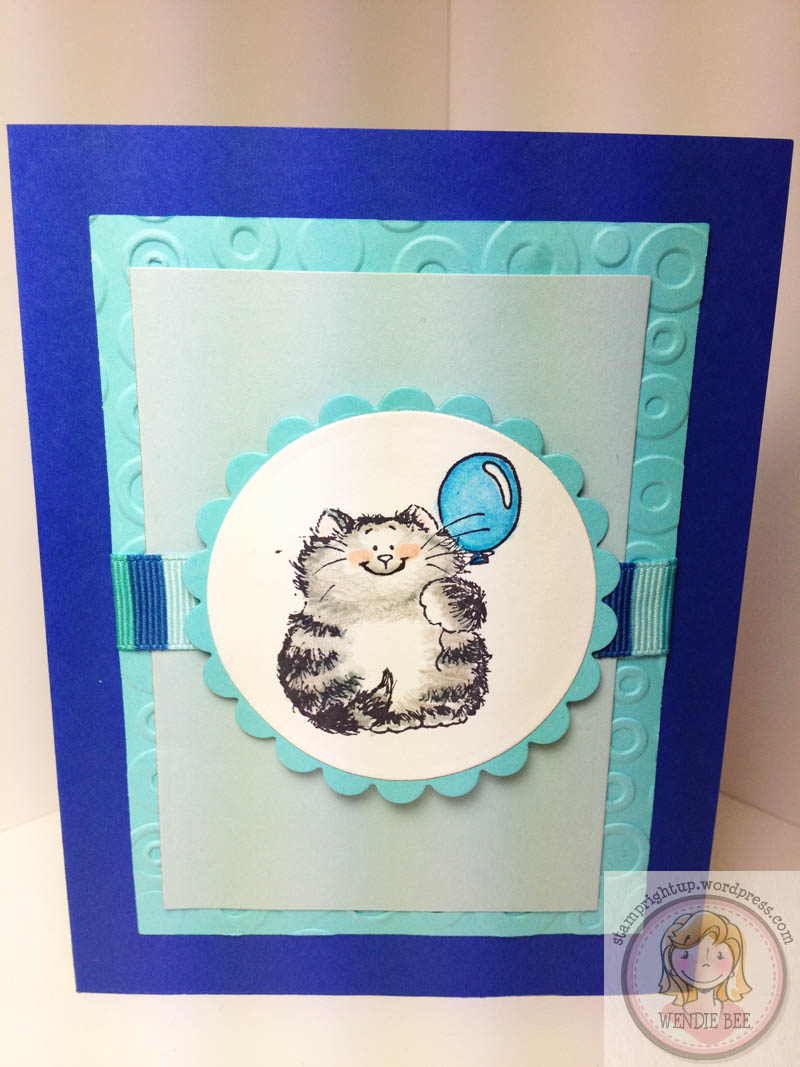
Penny Black stamp colored & blended with Crayola Pencil Crayons
My foray into coloring with my new Prismacolor markers wasn’t NEARLY as successful – the set of 48 I got did not have enough shades of one color to allow for a proper gradient blend.
Here is the video that madame Wong posted showing a tutorial on how to blend your pencil crayon coloring:
Here are a few additional tips to coloring & blending your pencil crayon coloring:
If you want to show texture (like fur in my example), then be careful not to over blend
Use only a pinpoint amount of baby oil – the more oil you have on your tip, the more it will blend your work. go over your colors a few times instead. Better to have not enough, than too much blending. And yes, you can blend too much. Too much blending = smeary, smudgy looking work
The better quality pencils you use, the richer your colored image will turn out.
I used Whisper White card stock from Stampin Up, but plain old card stock from Michaels also worked when I tested it.
Materials for my card:
STAMP: Penny Black (clear mount) “It’s Your Day”INK: Black Memento Archival Ink COLOR: Crayola Pencil Crayons BLENDING: Household standard type Baby Oil & Marker / Pen Nib refills (see video for other types of blenders you can use)
PAPER: Recollections (I don’t know the colors)
EMBOSSING FOLDER: Cuttlebug Spots & Dots
**EDIT UPDATE**
After some requests, here is a picture of the blenders that I use. I am Canadian & got these at my local Michaels. (I looked for the tool that was used in the video but I couldn’t find it.)