PinkFresh Studio Delighted For You

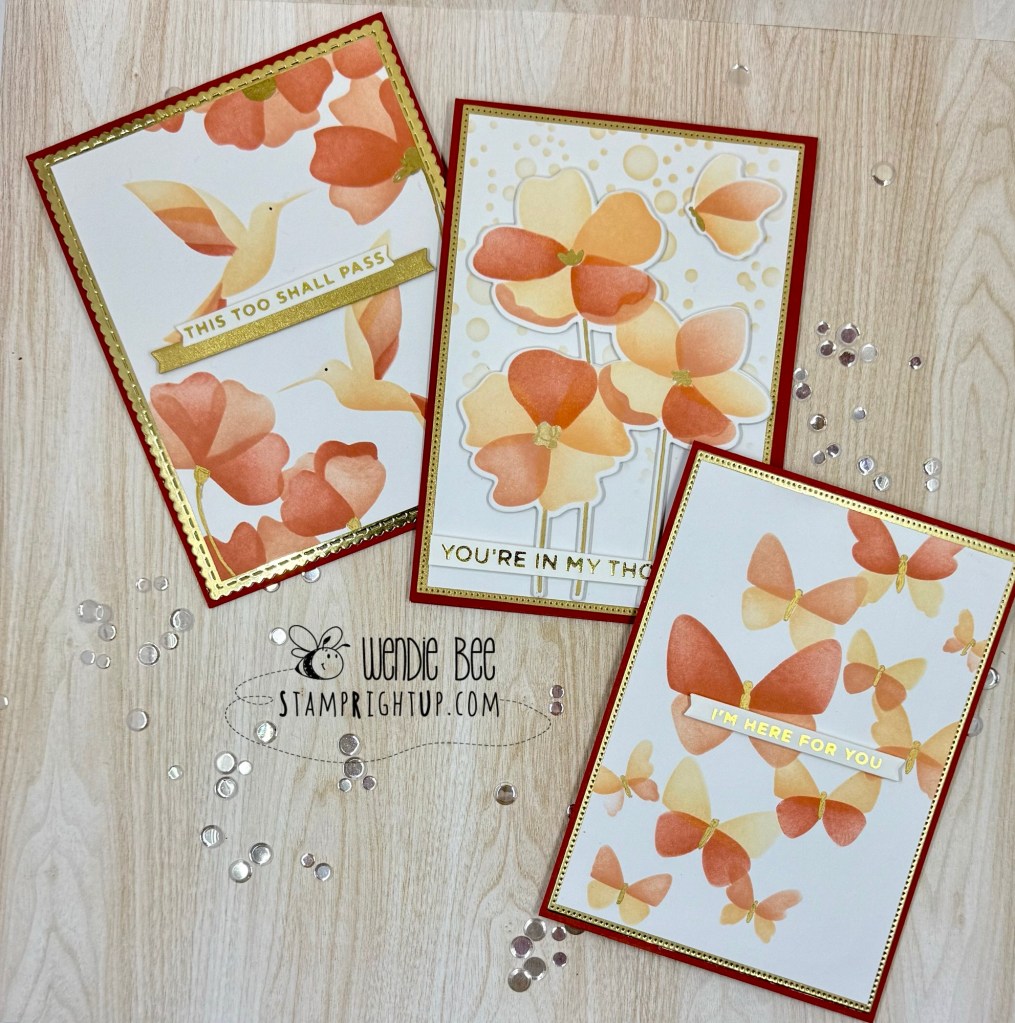
I have been trying to actually *use* supplies as I buy them, so when I purchased this Delighted For You stamp / stencil / die bundle from my local craft shop I made a point to use it!

When I saw this set, while I knew it would be versatile for color ways, but I immediately saw tiger lillies, so I chose a peachy-orange palette to start. The card base is Spellbinders Barely Peach (I think it would be Bellini equivalent now with the refresh)

Here is a list of the inks I used:

  • Honey Bee No Line Coloring Ink (background)
  • Lawn Fawn
    • Apricot, Peach Fuzz, Pumpkin Spice, Cilantro, Artichoke

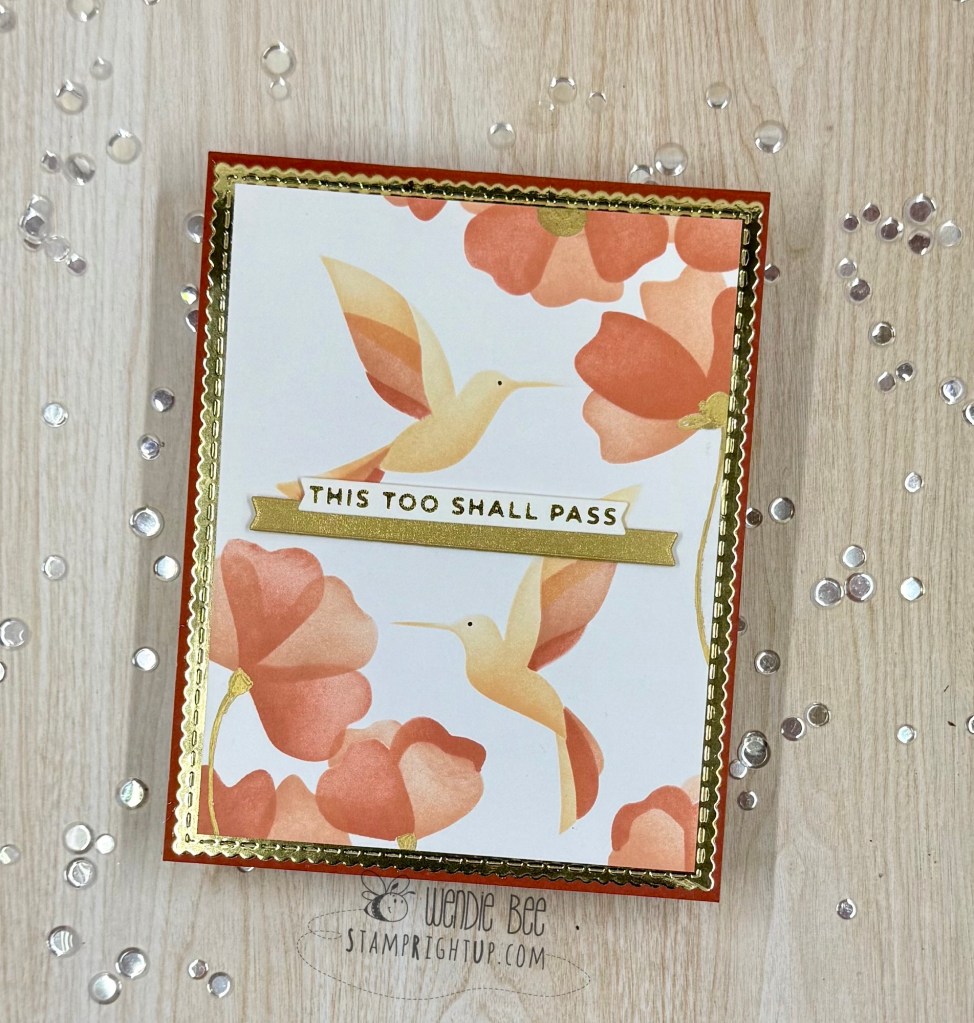
The background was made with a technique I learned from the fabulous Gina K. I took a piece of 65lb card stock and scored it at every half inch; then I took the Honey Bee No Line colouring ink pad straight to the card stock (laying it flat down) and just lightly brushed it. That created that faux wood grain/ shiplap look.

Foiling sentiments is wonderful, but it’s a lot of work for me to drag out my glimmer machine, so I happen to have a pouch of pre foiled & cut sentiments from PinkFresh so I just popped one on from that stash.

A few baubles to fill in & balance white space and voila! A card done. It took maybe 30 minutes in total but I’m super happy with how it turned out.

Lawn Fawn Shello Friends & Stitched Seashells Card Set

Another Crop & Create set, this Lawn Fawn Shello Friends stamp, die & coordinating stencil was so much fun to create with!

This was the first time I have actually used colouring stencils and it was surprisingly easy to get a great result. I can especially see colouring stencils being very handy for mass producing batches of cards. Our ‘homework’ was to stamp and cut for each example card, but I went a little bananas and created enough for multiples of each since it was so easy.

For all cards, these are the Lawn Fawn ink colors used:

  • Bubblegum
  • Moonstone
  • Fresh Lavender
  • Peach Fuzz
  • Merman
  • Butter
  • Celery Stick

Here are the cards I made – I have enough completed components to make a few more of each card left, all I really need to do is the background and then assemble.

If you’re on the fence about the coloring stencils, they’re great when you want to create but don’t want to pull out all of your markers – it makes for an easy card with a great result!

Taylored Expressions Create In Quads Flit & Flutter

Another amazing hit from TE, these create in quads are really a must have staple in every craft room. It takes more time to choose your ink colors than it does to make four ready to go card fronts!

The workshop from Crop & Create led by Taylor was instructed with the blue palette; I pulled this back out and created the warmer palette using Concord & 9th inks from previous events.

I didn’t have all the inks Taylor used, so I substituted from my Lawn Fawn collection – not shown is kiddie pool which I used for the lightest color in the blues palette.

Spellbinders Cheerful Chirps Collection: Flying High & Pretty Birds

I attended the Crop & Create Spring 2025 event, and kicking off my series of posts showcasing all of the amazing brands and product we did is the Spellbinders Cheerful Chirps collection using Pretty Birds & Flying High die sets, along with the Bamboo screen 3D embossing folder.

All cardstock used for these cards are from the new color wheel cardstock collection. The colors in my projects included:

  • Tutu / Dahlia / Bellini / Coral / Sicily / Carrot / Saffron / peridot / Rainforest/ Waterfall/ Teal Topaz / Breeze / Malibu / Oceanside / orchid / Mulberry / Violet / Acorn / Fog / Raven

Spellbinders Cheerful Chirps Flying High & Pretty Birds
Spellbinders Cheerful Chirps Flying High & Pretty Birds Cards

Concord & 9th Our House Collection

If you’ve ever dreamed of building the perfect little paper house, the Our House collection makes it easier (and more fun!) than ever! This charming card was created using the Our House Dies, and I had so much fun personalizing it with all the delightful add-ons.

This die set is packed with customizable details — from interchangeable window shapes and scalloped roof tiles to flower boxes, balloon clusters, and banners! Whether you want to create a cozy cottage, a festive celebration scene like this one, or a wintery holiday home, the possibilities are endless.

The dies are perfectly sized to fill an A2 card front, but you can also use them to create a free-standing house-shaped card for something extra special. I used the coordinating Our House Extras Dies to add balloons and that festive banner, which I stamped using the Our House Stamp Set. The windows were lightly ink-blended for a soft glow effect, and the flower boxes add that perfect finishing touch.

Want to step it up even more? The Our House Embossing Folder adds dimensional brick textures for even more realism and charm.

Whether you’re making a card to celebrate a birthday, new home, retirement, or just because — this collection lets you create a scene full of personality and joy.

💡Pro tip: Mix and match elements with other seasonal sets for year-round versatility!

Thanks for stopping by — and don’t forget to tag me if you make a project using this set. I love seeing your creations!

@stamprightup

This Calls For Confetti Stamptember Exclusive ~ Unbelievably Bigfoot Card

I have had this stamp / die / stencil combo since September. It was the Simon Says Stamp Stamptember 2024 This Calls For Confetti exclusive. I got the foot print add-on stencil separately.

Is it perfect? Absolutely not. This card is for my Dad, he’s my favorite person in the whole world. Will HE notice all the little hiccups that I do? Definitely not.

We’re our own worst critics. I bet the love & thought put into a card erases any ‘mistakes’ we might make in the eyes of the recipient.

So rather than trying to be perfect or waiting, SEND THE CARD!!! 💝

Honey Bee Lovely Layers Hoosier Cabinet

As part of our 2024 Fall Crop & Create Delivered workshops, Honeybee included this amazing Lovely Layers Hoosier Cabinet die set.

Yes, it has a lot of tiny pieces, but the it’s remarkably easy to work with!

Most of my pieces cut beautifully from coloured cardstock, or I used distress inks to color white 80lb cardstock to suit whatever color palette I wanted.

Using Honey Bee Metallic Mix pearls were perfect for the tiny drawer & door knobs. Enamel dots or Nuvo drops or anything you have in your stash could also work beautifully.

To add a festive twist, I pulled out my Lovely Layers Christmas Market Cart add on from Honey Bee and used the Bundt, pine boughs and stocking. Crimson cardstock from Spellbinders and white pieces inked with spun sugar oxide for the dishes and rustic wilderness for the boughs.

Honey Bee Lovely Layers Hoosier Cabinet with pieces from Christmas Market Cart Add On

Concord & 9th Birthday Bonanza

This is my 3rd fall Crop & Create Delivered event, and one of the workshops was led my Cathy Zielske of Concord & 9th using the stamps, die set & stencil set.

I had a ton of trouble getting the white embossing to look as good as Cathy’s, but it was better than horrible as Gina K always says, so I decided to do my best and just finish the card

All Concord & 9th color cardstock is from the newest release – watermelon, eucalyptus, rainforest, creamsicle

Pink Fresh Studio Fruitalicious Washi Card

I just love these Washi panels from Pink Fresh Studio! When creating these I always mount the washi panels on 110lb cardstock to give them almost a chipboard ephemera feel.

For this batch, I mounted the washi ephemera pieces on the stitched Arch diecut from My Favorite Things, and added just a hint of a stenciled background using Lost Shadow distress oxide ink set the perfect backdrop for these gorgeous pieces.

My Favorite Things Jenoblade Stuck Together Mini Slimline Cactus Card

Jenoblade hits another stamp set design out of the park with this Stuck Together stamp set & coordinating dies.

The images are a great size to use as a single focal images or together like I did.

Slime line finished card measures 3.5” x 6” and I used a stitched die to give a subtle frame along with a bit of squeezed lemon distress oxide ombré shading.

A few clear droplets to finish it off and it’s ready for sharing!