
I was so excited when Stampin Up came out with these Thinlit flip-it style cards. Each thinlit comes with various accessory dies. I was super excited when I figured out that the scallop that comes with the circle thinlit bundle is exactly the same as the largest scallop punch (which I did not yet own)
Using the circle thinlit bundle, I made this card using the owl punch. It is a bit of a learning curve to figure out how to cut the second layer, but once I figured it out I was quite happy with the result.
Once I make a few more of these cards, I will be posting a tutorial using these thinlits. Be sure to stay tuned for that!
TIPS & TRICKS (PART 1)
- I have found that if you use a 12×12 sheet of paper you will have considerably less paper waste / scraps left over.
- For the base, if you do NOT have a magnetic platform for your Big Shot, cut a piece of paper 1/8″ longer than needed
- For the second layer – I cut the crumb cake at 5 1/2 x 5, then trimmed any excess of the top & bottom
- You can use your 2 1/2″ circle punch for the middle circle – it will leave about a 16th of an inch space as you can see below
- The scallop die is exactly the same as the 2 3/8″ scallop punch in the annual catalog
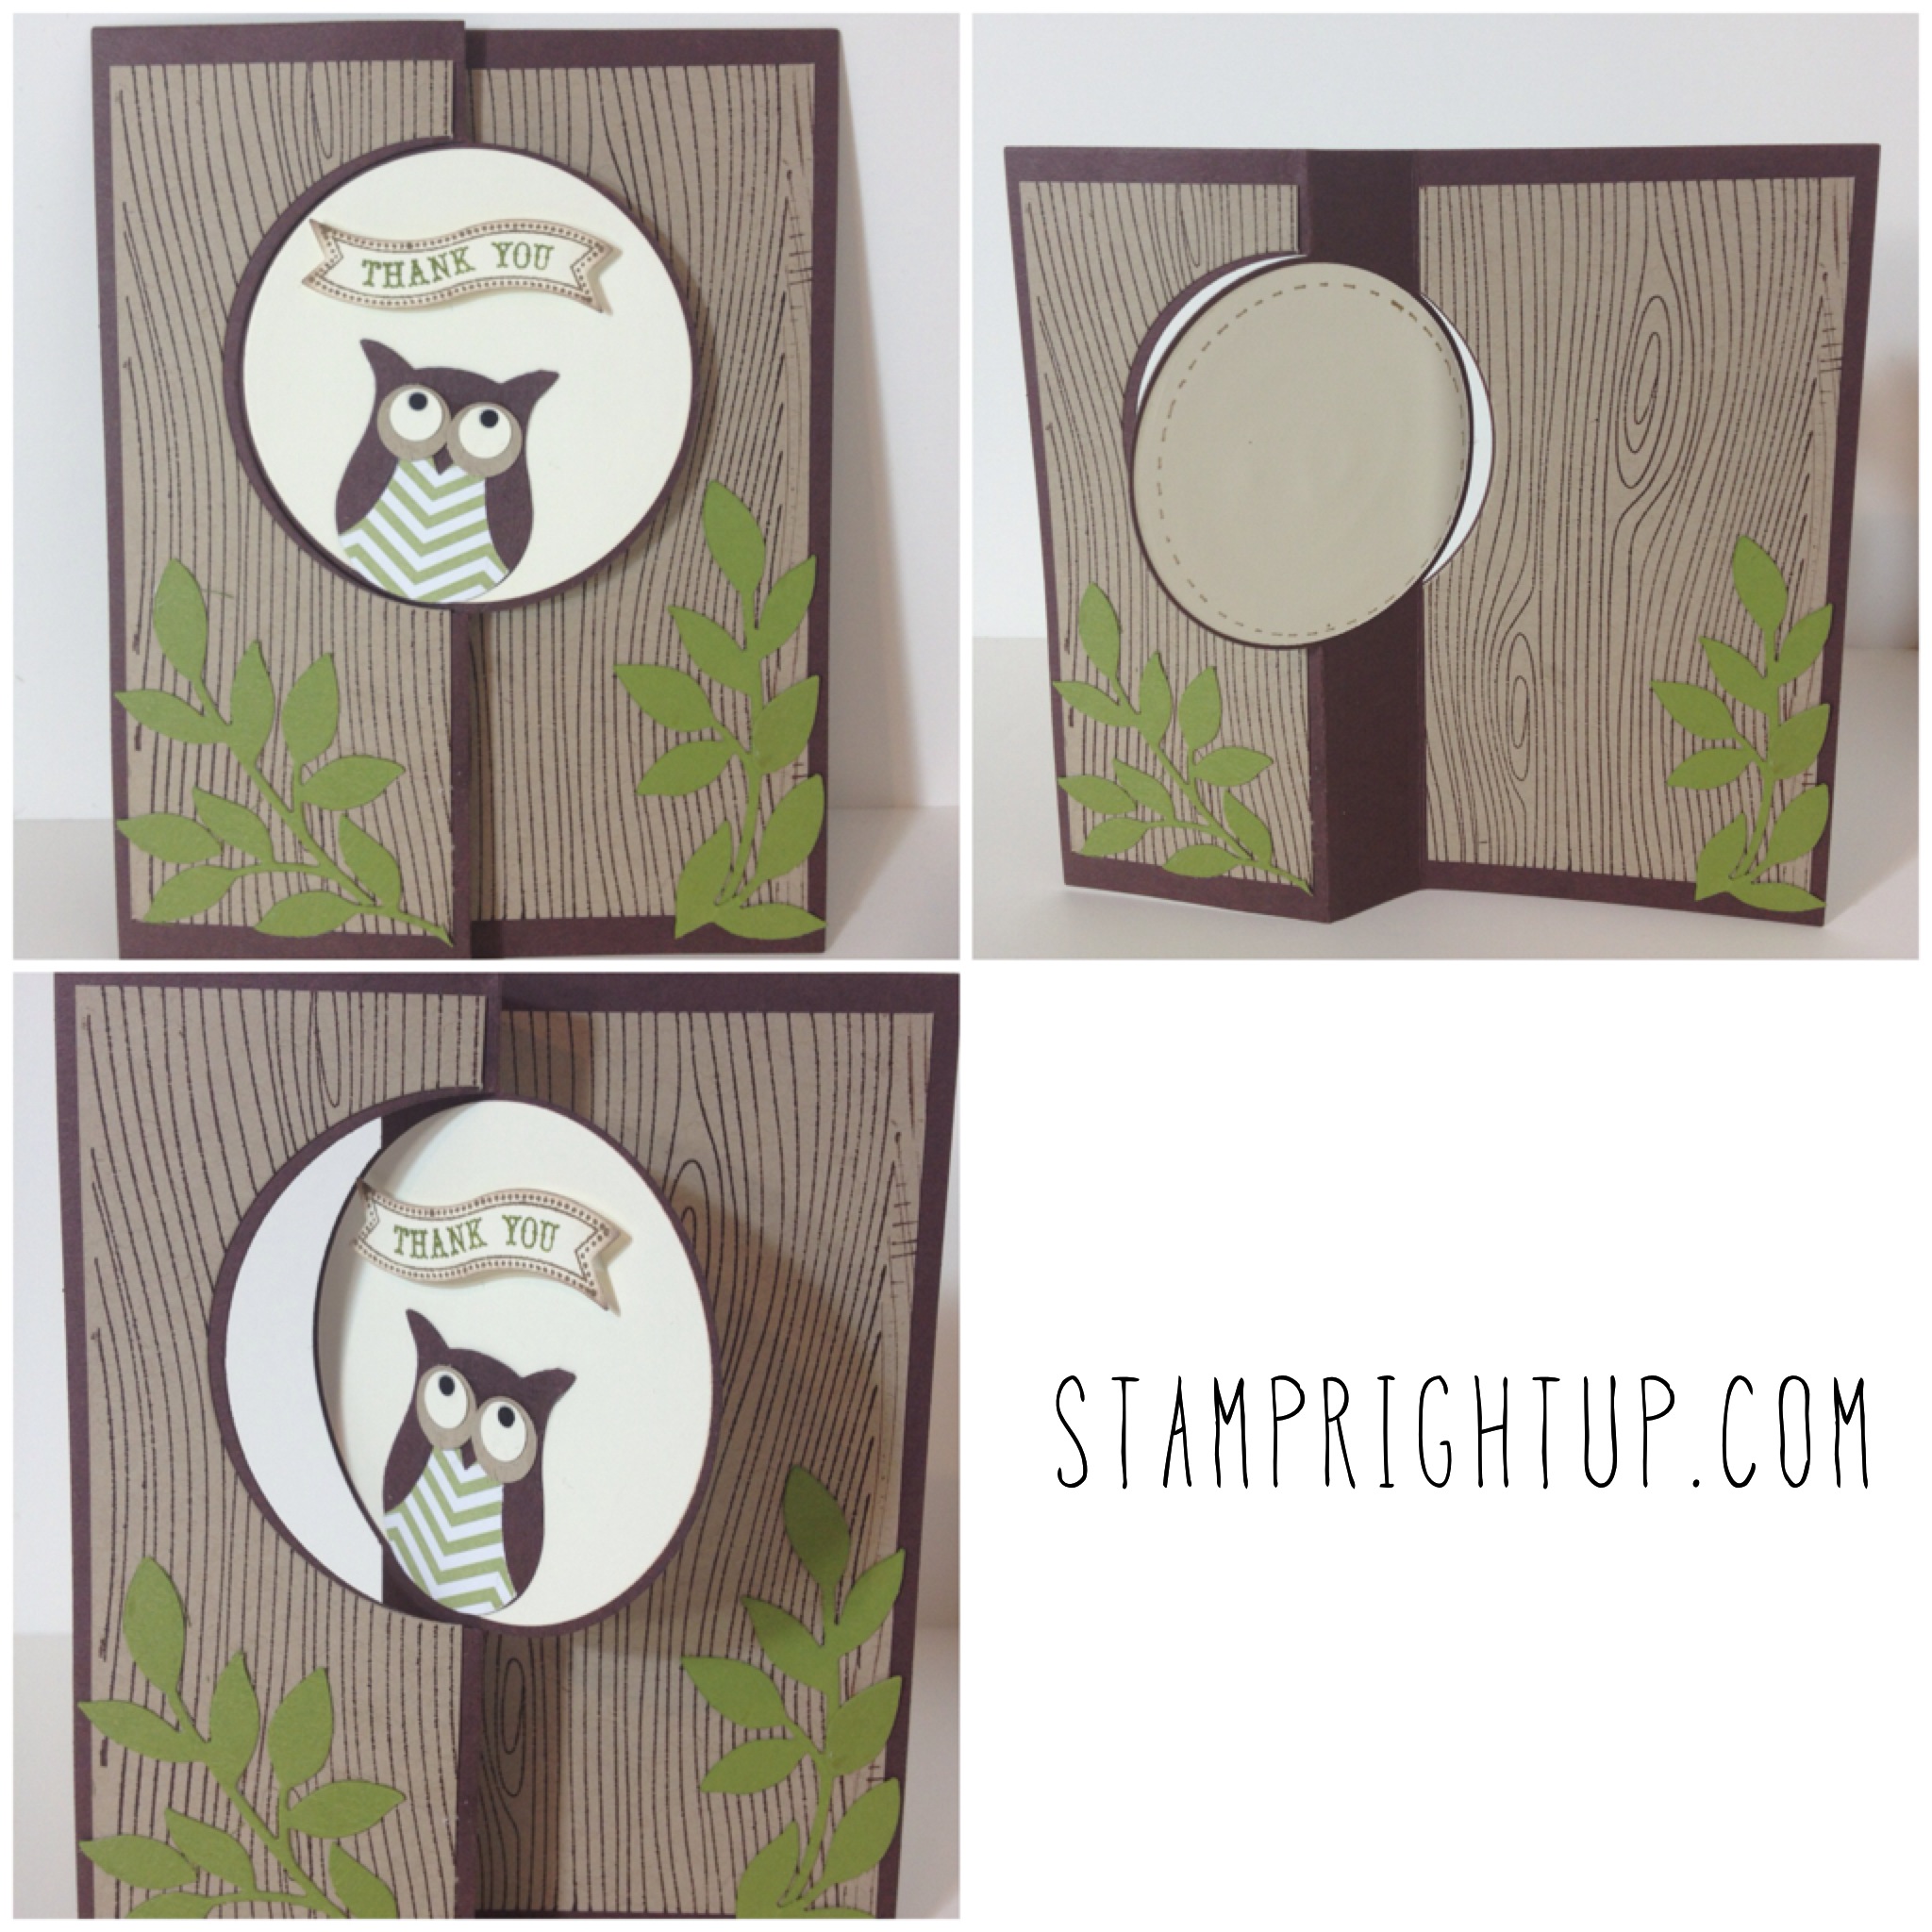
Stampin Up Circle Thinlit & Owl Punch
Here is what I used to make this card:
STAMPS:
- Wood grain background stamp
- Itty Bitty Banners
INKS:
- Chocolate chip
- Baked brown sugar (markers – on sentiment banner)
- Old olive (markers – on sentiment banner)
PAPER:
- Chocolate chip
- Crumb cake
- Very Vanilla
- Old olive (for leaves)
- WIld wasabi DSP (for owl vest)
- black (for eyes)
TOOLS:
- Owl punch
- 2 1/2 ” circle punch
- Little leaves framelits


